Hi BD
I bought a Swedish Svea 123R factory brand new about four years ago. It’s always had a small candle flame at the jet whenever I turn off the spindle. Do you have any tips you can share about how to fix this? Thanks!
Bert in MO
Hi Bert
Thanks for your question. One thing though…
If you bought your Svea 123R new about “four years ago” then it was not made in Sweden. Svea is a brand owned by Optimus since the early 1960’s after the Svea company in Sweden sold their company to Optimus. Optimus (now also just a brand and one cog of the big Swiss-based Katadyn corporate conglomerate) has not been making stoves in Sweden since the late 1980’s or early 1990s, if I recall correctly.
So, yeah, yours is an Asian-made version of the Svea. Even though it says “Sweden” on it. (It doesn’t say “Made in Sweden” because it is not made in Sweden, but in Taiwan.)
Just my opinion, but, I’d suggest getting one of the Swedish-made models as the quality and performance of the originals is much higher in those better-made stoves.
I have a couple of videos at my YouTube channel that show the disassembly, repair, and reassembly of the Svea 123R. You can find them here:
https://youtu.be/LNJSDacuCHQ
https://youtu.be/-svgLuqyGG4
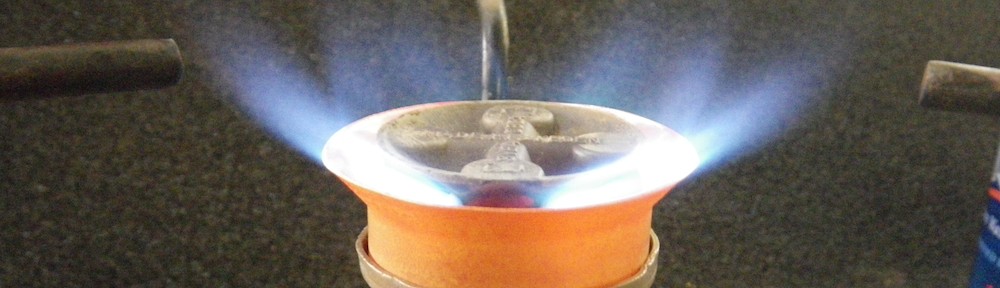
Here’s the lowdown on candle flames on the SVEA 123R.
- Make sure the cleaning needle timing is not the issue. Remove the needle and try the stove without it. If there is still a candle flame without the cleaning needle in the stove, go to #3.
- If the candle flame goes away without the needle in the stove… reset the cleaning needle a click shallower into the valve body (fewer clicks). What’s happening is that the cleaning needle is hitting bottom before the spindle tip can seat closed. So, putting the cleaning needle rack higher (less clicks) will allow the spindle tip to seat before the cleaning needle rack hits bottom.
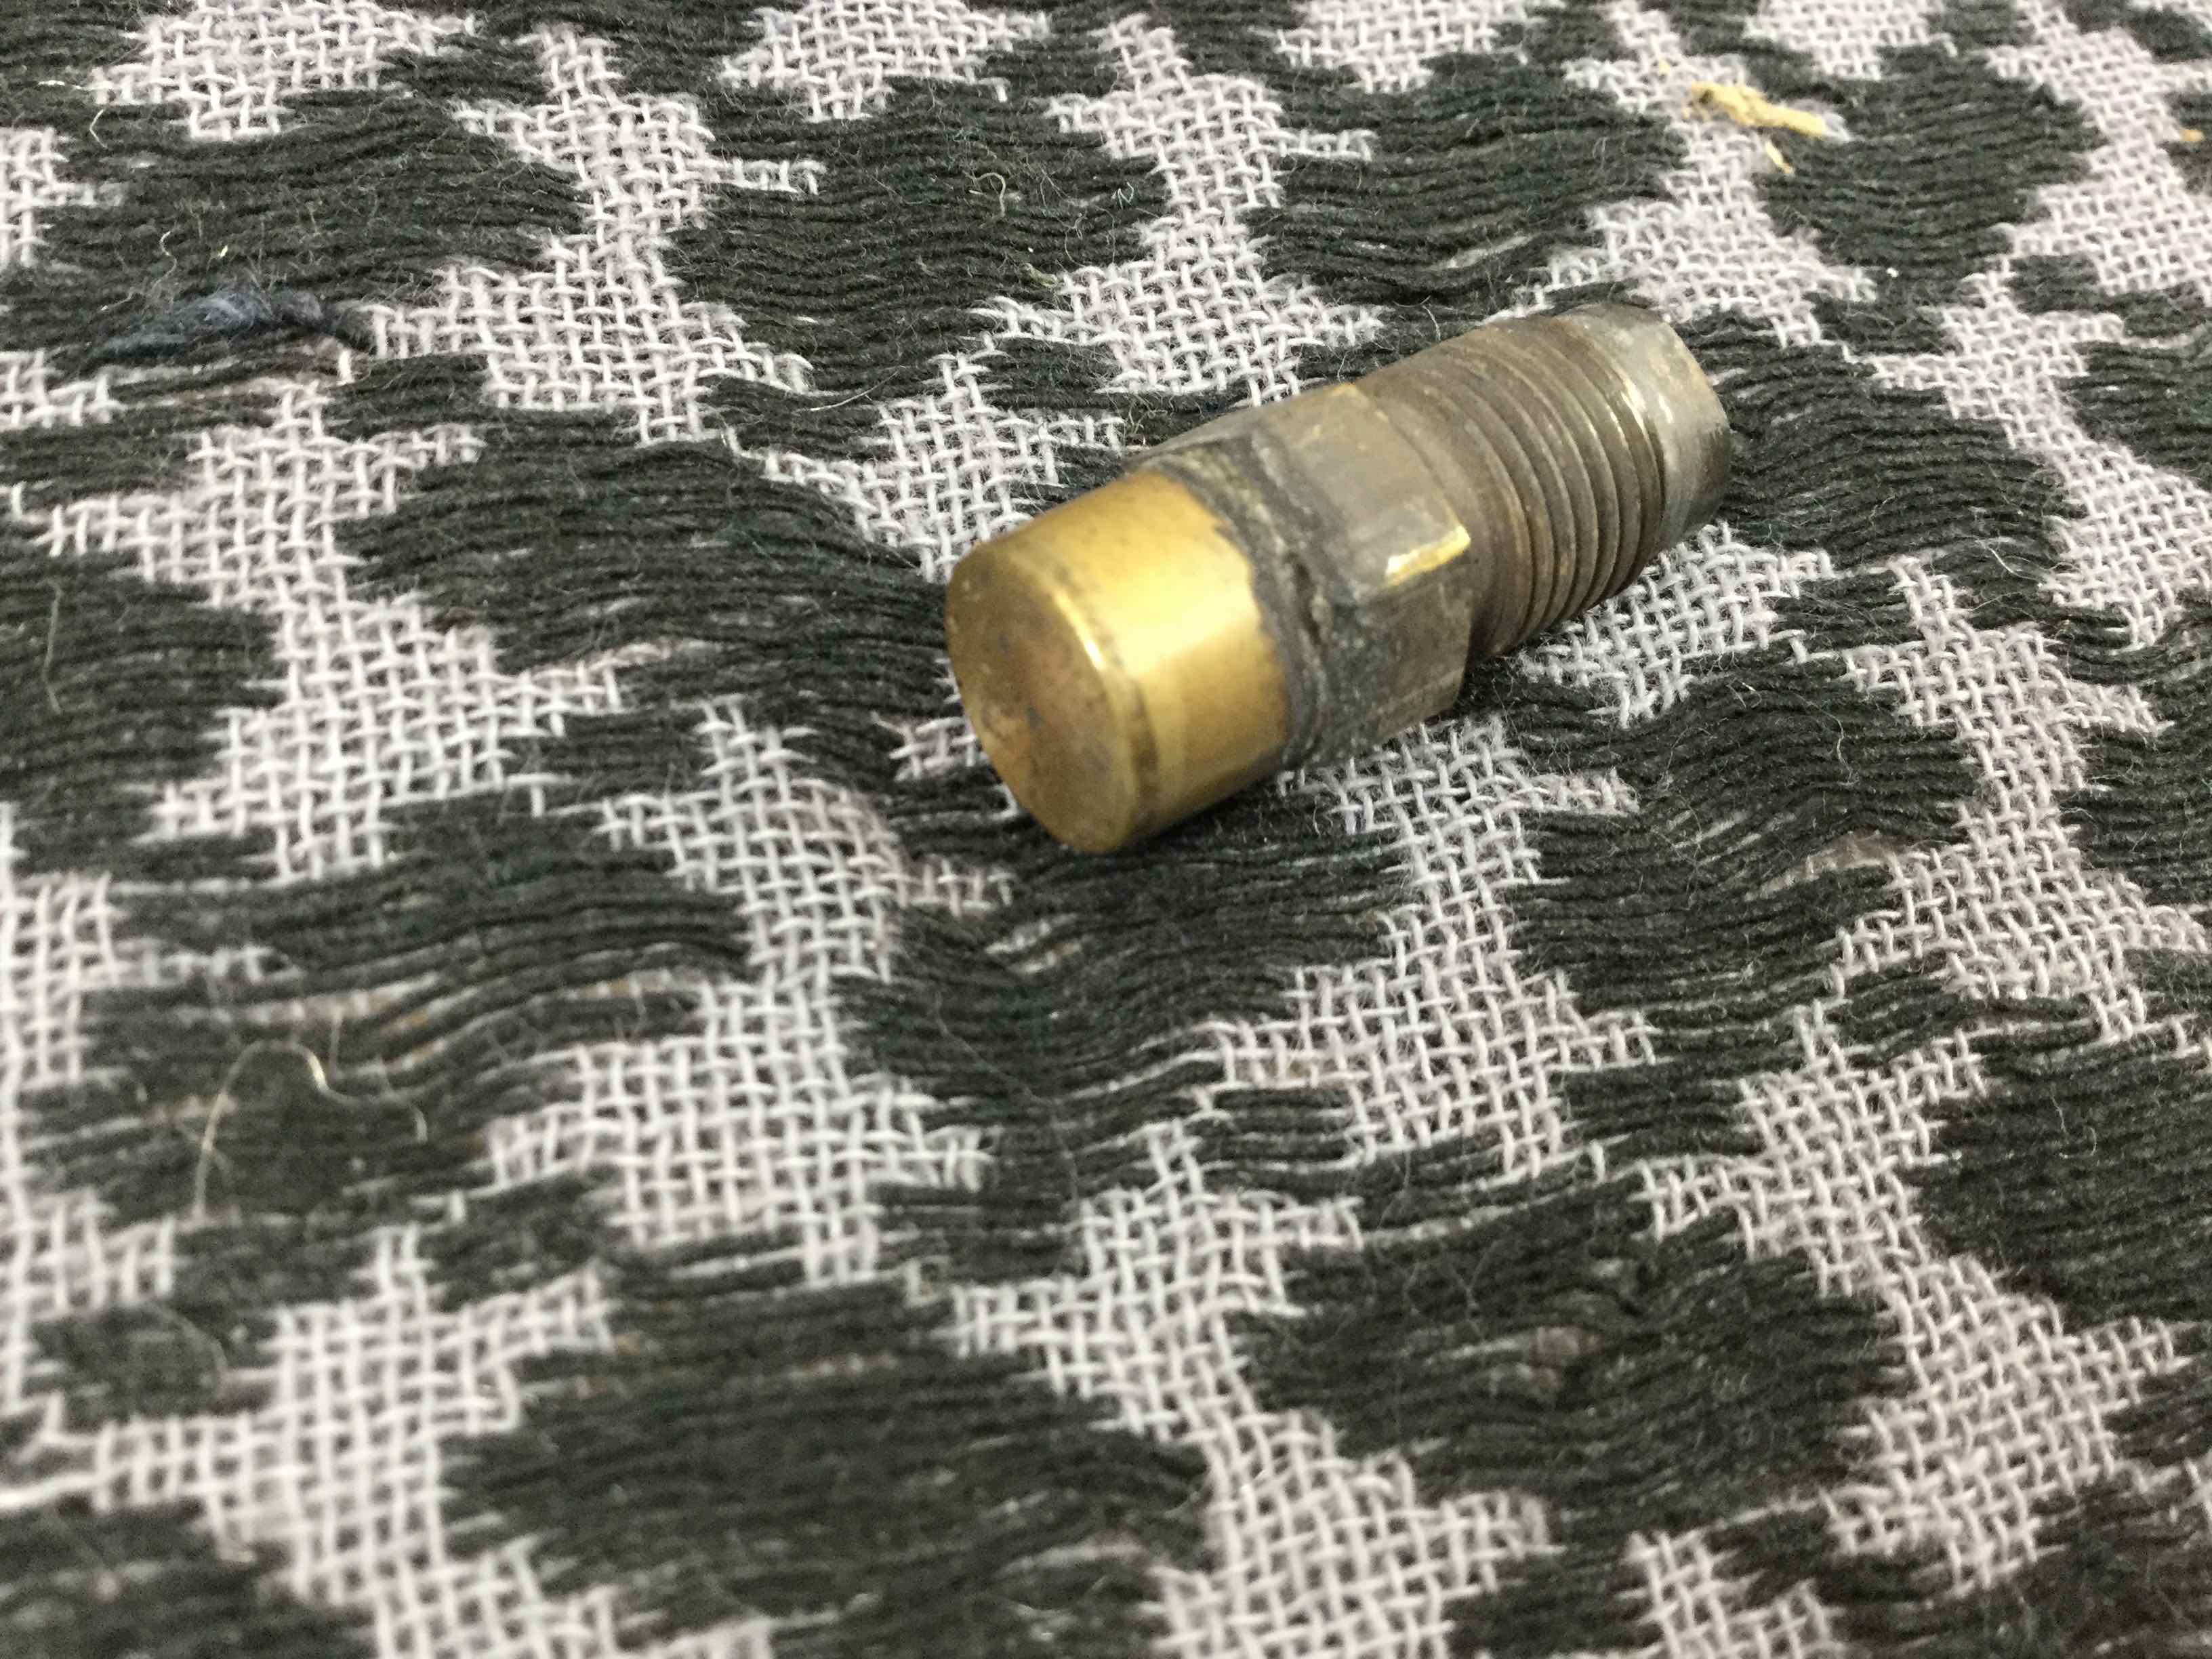
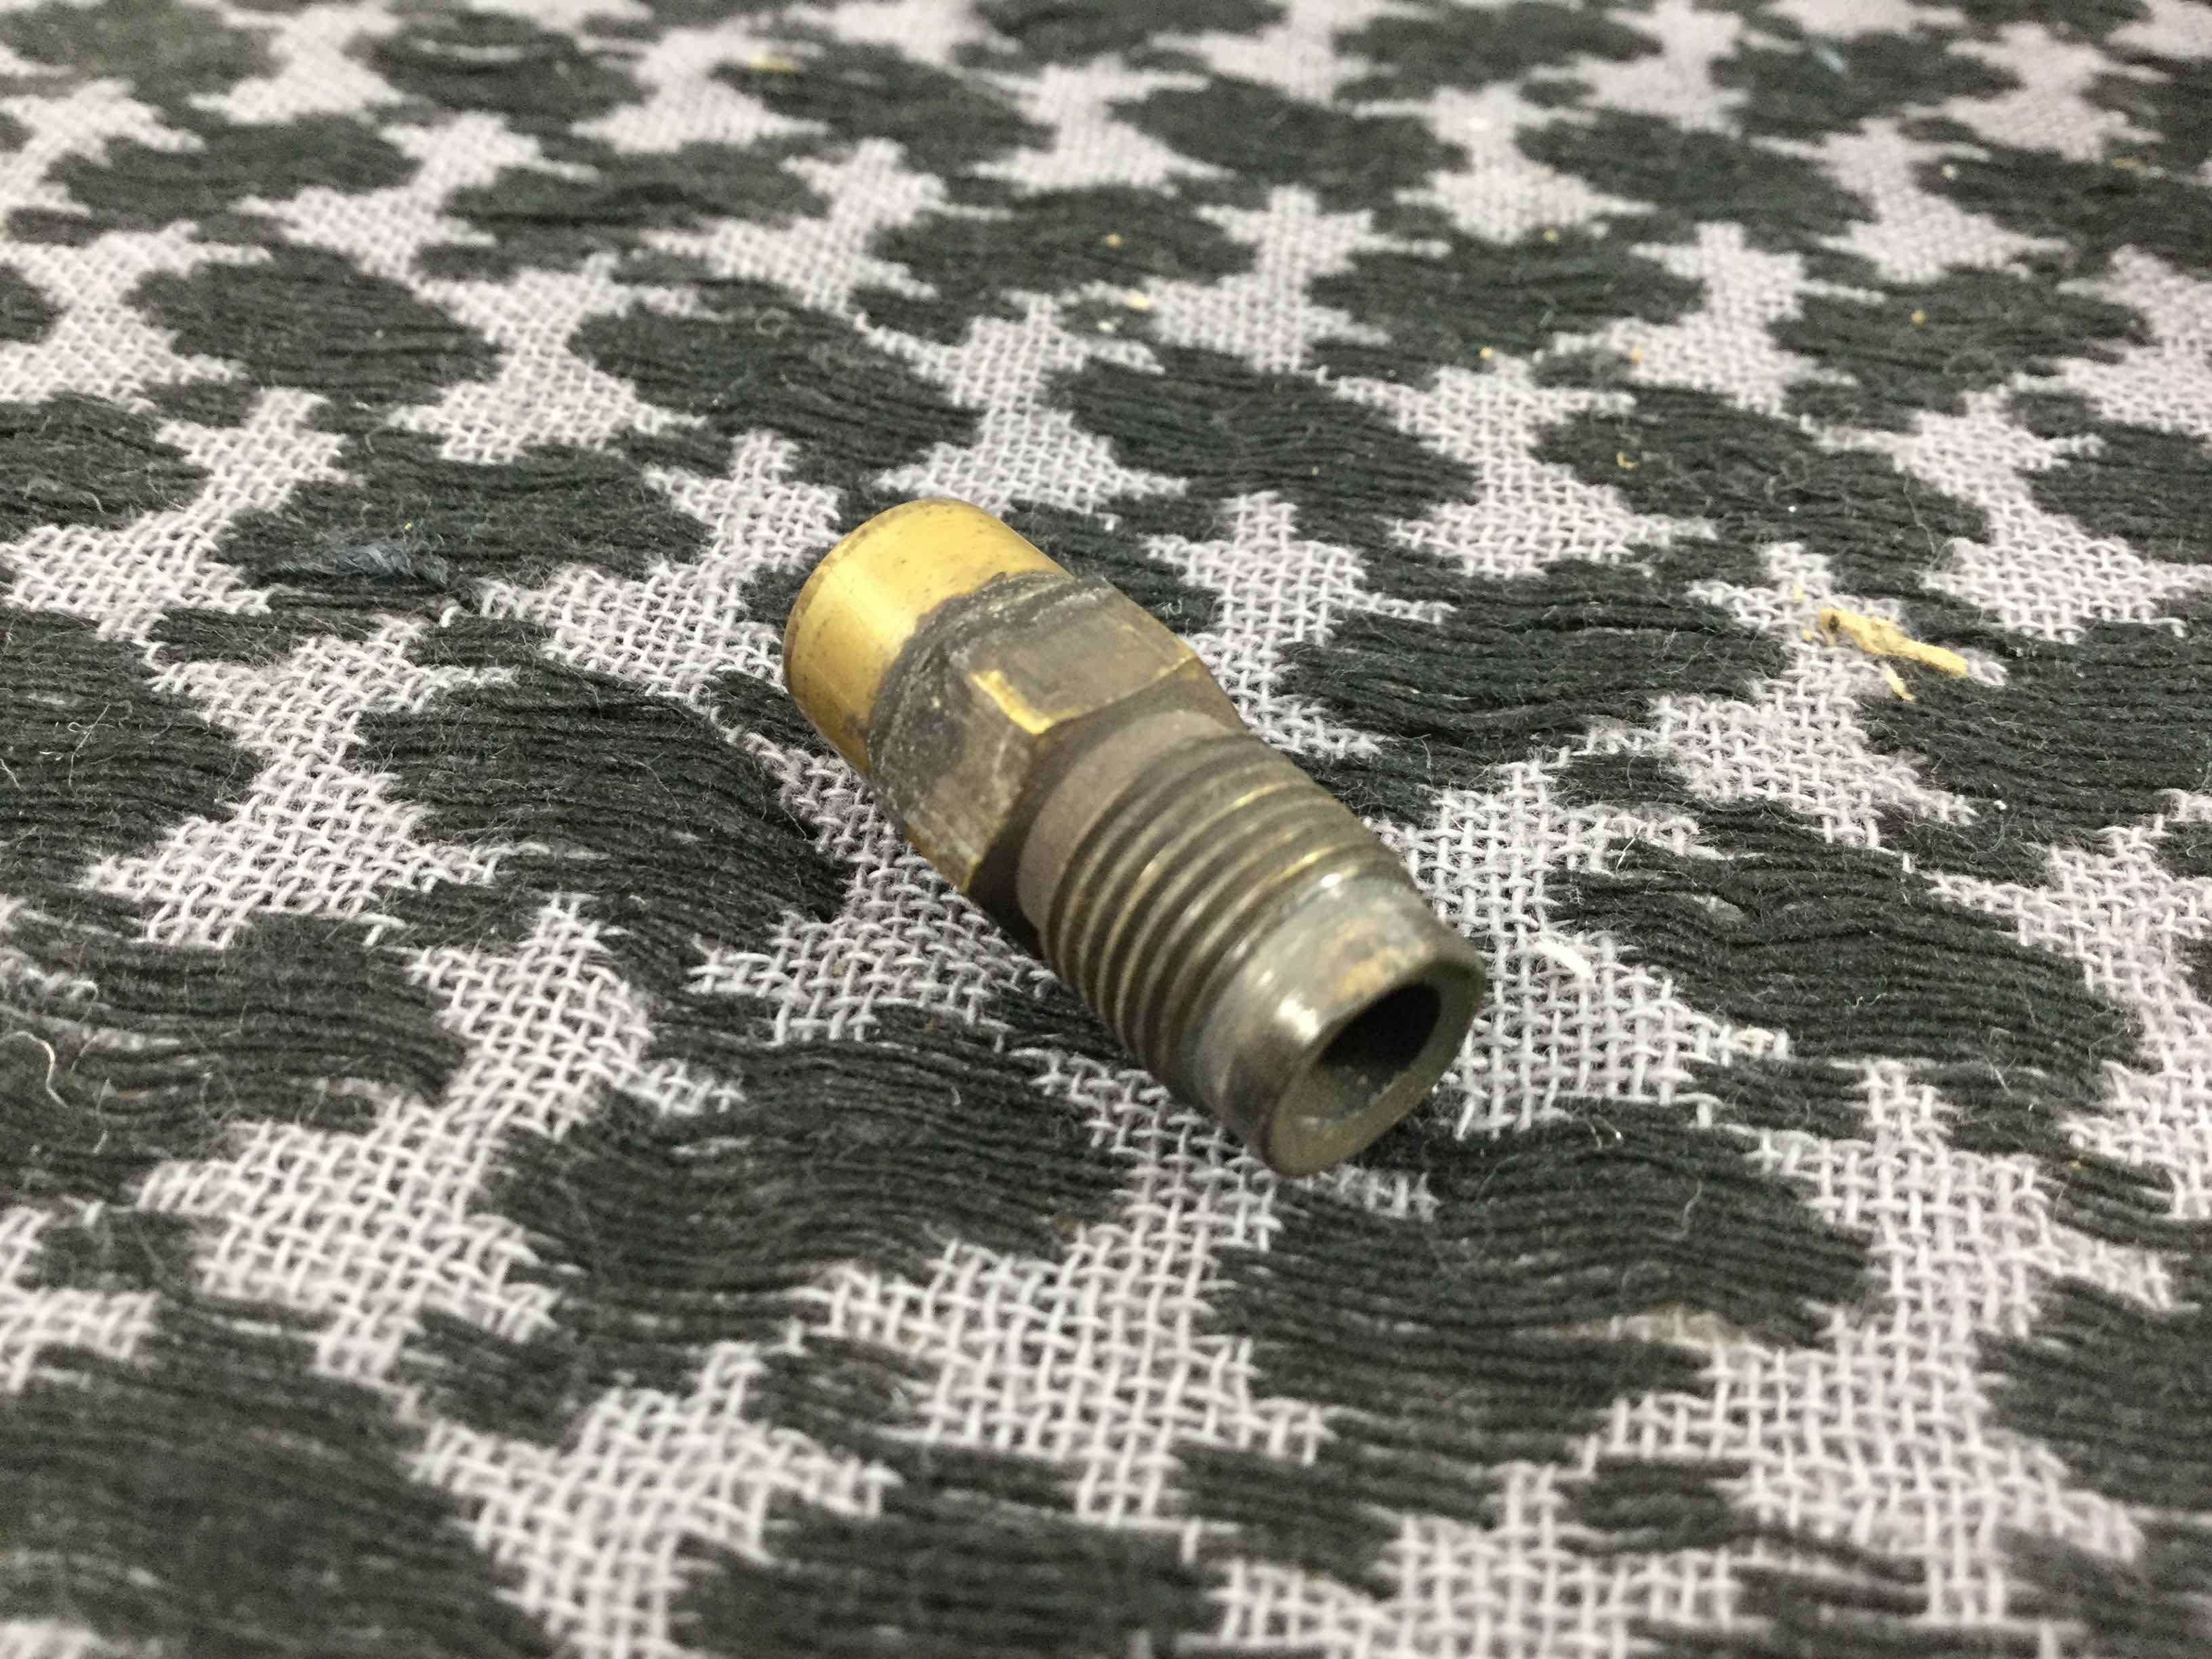
- Remove the spindle nut and the spindle. Check the condition of the cone-shaped end of the spindle. It should be a smooth cone.
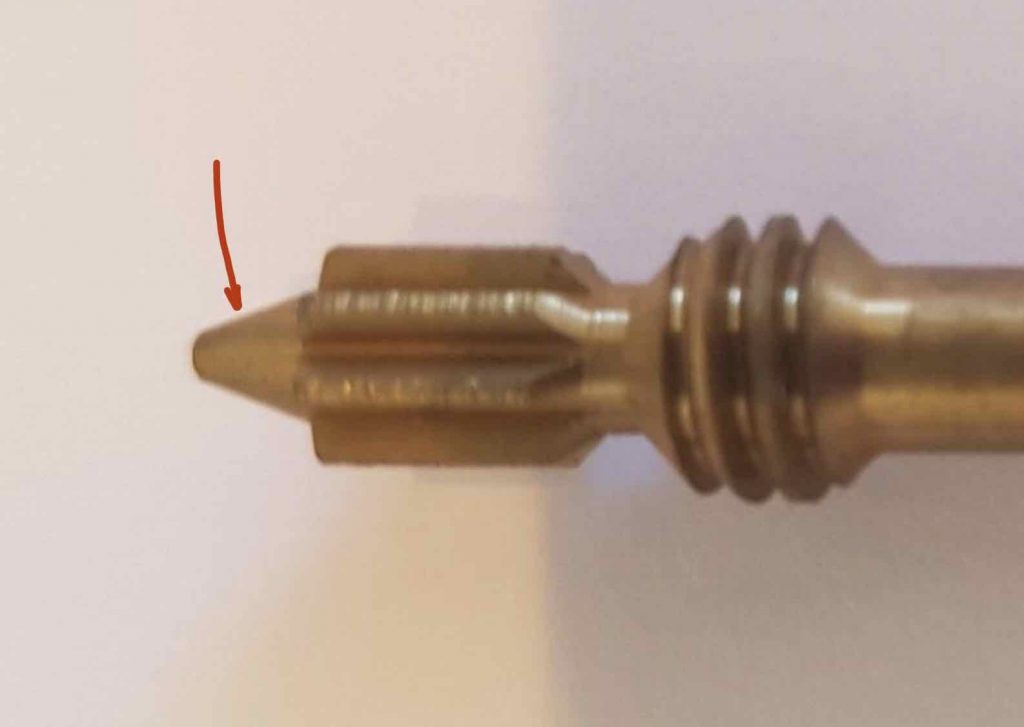
Good condition spindle
It should not have a ring worn into it and it should not have a step or steps worn into it. If it does, then someone has been closing the spindle valve too hard and has damaged the spindle tip. If there is enough material still there (if the damage isn’t too bad), you can chuck the spindle into some sort of spinning tool. A cordless or corded drill will do the trick. A drill press or a lathe is even better. Reshape the cone on the end of the spindle with a fine file and sandpaper while the spindle is spinning in your spinning tool of choice. If you can’t get it fixed because there is not enough material left or the damage is too great, you’ll need to replace the spindle.
- While the spindle is out… examine your spindle graphite. Brand new, spindle graphites should be about 6mm long. If the graphite is less than 3mm long or if it is not shiny and grey, but instead has grey-colored pulpy, woody, or hairy looking material (asbestos?), change it out for a new graphite. The pulpy ones fall apart faster than the solid grey graphites and the pulpy stuff gets in the spindle valve seat so they leak.
- While the spindle is out… clean out the threads of the spindle nut, and the threads in the valve body they mate with, of any graphite residue so it doesn’t end up causing leakage by getting in the your spindle valve. Dental tools work good for thread cleaning. Use some Qtips and clean the spindle valve seat with some solvent or Coleman fuel so the Qtips come out clean. Do a visual inspection of the spindle valve seat inside the valve body using a flashlight. You should see a circle of bright brass with a little hole in the middle. The bright brass is the metal surface your cone-shaped spindle tip seats against. Make sure there’s no debris or goo in there.
- Reassemble everything, with new parts if you are using them, and give it a try without the cleaning needle. No candle flame? Great! Now add in the cleaning needle set to between 3 and 5 clicks into the valve body and top off with the jet. Test again. Should be working fine now. If you get the candle flame, then reset the needle one click less (shallower) into the stove body.
Happy camping! BD